Application Specific Systems:
• Wood Product Inspection Systems
•
Printing & Finish Inspection Systems
• Metal Part Inspection Systems
• Thread Analysis & Inspection Systems
• Bearing Assembly Inspection Systems
• Bearing Race Inspection Systems
• Automotive Control Arm Inspection System
• Manifold & Crossover Inspection Systems
• Assembly Inspection Systems
• Battery Inspection Systems
• Tablet, Capsule, and Pill Inspection Systems
• Circuit Board Component Assembly Inspection Systems
• Packaged Liquid Product Inspection Systems
• Caps & Closures Inspection Systems
• Gravity Belt Thickener Controls
• Ultra-Accurate Automatic Gauging Systems
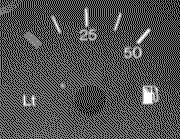
Print Quality inspection of a fuel gauge
 The image shows a section of a dash board with some printing defects. The "r" of the "Ltr" mark is missing and the gas pump exhibits a white spot in its display area.
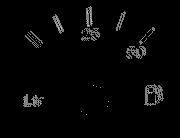
 Typically, the basis of a print quality inspection is a difference image, containing the differences between the current test piece and a reference image. The
creation of a difference image for print quality inspection or any other type of reference image comparison is far from trivial. Because of positioning and image
capturing inaccuracies, edges are practically never aligned precisely so that a simple subtraction would lead to the detection of severe pseudo errors along the
edges. This is illustrated by the adjacent image. The pronounced errors are due to a misalignment of a perfectly correct print.
 To deal with this problem, NeuroCheck's Print Quality Inspection function uses a highly configurable, sophisticated three-stage positioning process and also takes
heed of the structure size of the objects to be checked. The parameters can accommodate any desired distinction between tolerable and inadmissible defects.
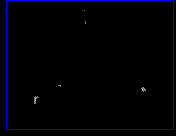
Furthermore, the type of error (missing print, additional ink, both) can be selected also. The image shows faultless detection of all defects by a hierarchical
template matching algorithm.
Due to the consistent object-oriented approach of NeuroCheck you are not restricted to a single more or less flexible function when build print quality inspection
applications. The difference image can of course be analyzed with the full range of functions in NeuroCheck.


