Application Specific Systems:
• Wood Product Inspection Systems
•
Printing & Finish Inspection Systems
• Metal Part Inspection Systems
• Thread Analysis & Inspection Systems
• Bearing Assembly Inspection Systems
• Bearing Race Inspection Systems
• Automotive Control Arm Inspection System
• Manifold & Crossover Inspection Systems
• Assembly Inspection Systems
• Battery Inspection Systems
• Tablet, Capsule, and Pill Inspection Systems
• Circuit Board Component Assembly Inspection Systems
• Packaged Liquid Product Inspection Systems
• Caps & Closures Inspection Systems
• Gravity Belt Thickener Controls
• Ultra-Accurate Automatic Gauging Systems
Assembly Check of Car Air-Conditioning Unit
This application has been taken from the book Industrial Image Processing by Christian Demant, Bernd Streicher-Abel and Peter Waszkewitz, published by Springer (Berlin, Heidelberg, New York), ISBN 3-540-66410-6.

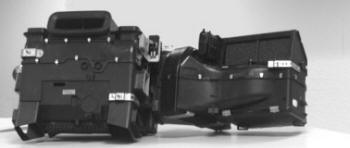
The image shows a car air-conditioning unit. There are a lot of small parts, like tubes, screws and clips, attached to this unit.
To check the presence of these parts is not very difficult conceptually, but it poses some interesting problems.
The first problem is the size of the unit. It measures almost 3 feet in length, whereas some of the parts to be detected are smaller than a quarter of an inch. It
is immediately clear that such a check cannot be done using a single camera. The final setup consisted of fourteen cameras connected to two camera inputs of a
DT3152 frame grabber using external multiplexers. The multiplexers are switched from within NeuroCheck using digital I/O. Images from all cameras are captured at
the beginning of the check and stored on NeuroCheck's image tray so that the test piece can be removed from the inspection station even before processing is
complete.
The second problem is lighting. It proved impossible to design an overall optimal illumination setup for the complete unit. Therefore a specifically designed
illumination was assigned to each camera. The lighting is automatically switched together with the camera inputs by digital I/O.
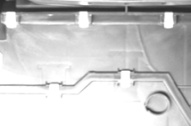
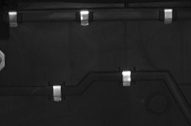
The following images show the flat left and the curved right area of the unit. Under an unfavorable angle of incidence the dark plastic reflects the light so strongly
that the metal clips blend together with the background. It is obvious that the different geometrical properties do not allow for simultaneously optimal illumination of
both areas.
 |
 |
 |
 |
Another important aspect of this application is positioning. Due to the size of the unit and the elasticity of the plastic position variations in
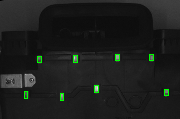
the range of a few millimeters are inevitable. To overcome this problem, larger parts, which are easily detected, are used as position reference. The following image shows the final
result image for the left section of a unit. Not only is the optical inspection much more flexible than the conventional combination of mechanical components with inductive calipers, it has also proven to be more reliable, as
it has detected several units with missing parts which tested OK with the mechanical/electrical inspection system.


